|
|
|
This is a simple guide for using MKV tools, as should be apparent from the title. Download MKVtoolnix version 4.1.1, for example here. Yes, 4.1.1, because newer ones have issues and no benefits. You will see that I'm using 4.4.0, but unlike you, I know what I'm doing. I know you don't know what you're doing 'cause you're reading a guide that explains how to do what you wanna do. Install/unpack. The 2 files that you'll use are MKVextractGUI.exe and mmg.exe. MKVextract is for getting things out of MKVs. Open it, load an mkv file and you'll see this:  As you may guess (unless you're really dumb), you check boxes, click 'Extract,' and it extracts the streams you checked. Here you can see the subtitle stream checked (in case you couldn't tell). That's all nice and stuff, but fuck that. MKVextract only lets you open one file at a time, so if you want to extract subs from 26 files, it'll bug the hell out of you. So instead you'll just use a search engine to locate this thing called mkvcleaver and download that. Several minutes (hopefully seconds, but w/e) later... 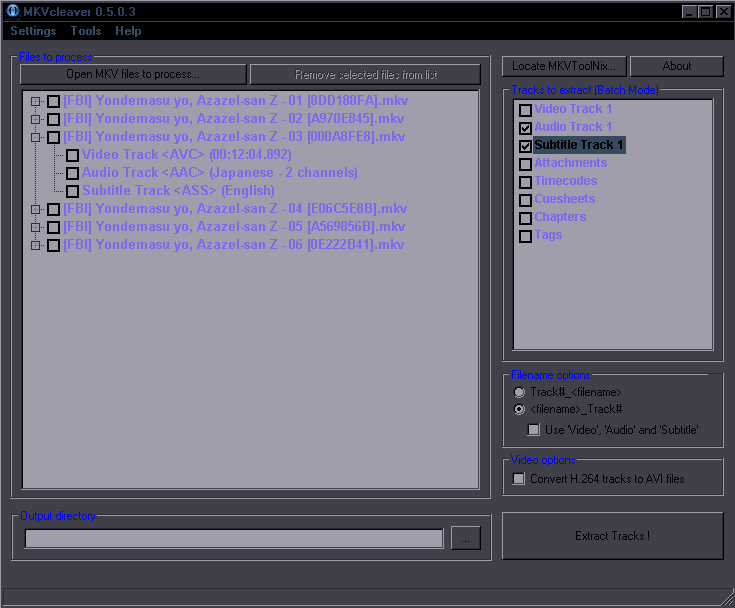 Under each file you have pretty much the same menu as in mkvextract. On the right is a menu for all the files you have loaded. Right now, this will extract audio and subtitles from all 6 files. If you want for example subtitles from all files and from one of them audio too, check subtitles on the right, and under the file you want audio from, check both audio and subtitles. That's all. Now you know how it works. Let's move to mkvmerge - mmg.exe. This is where you put MKVs together and where you can do other stuff too. Putting stuff together is easy - you just add all the streams you need and mux. 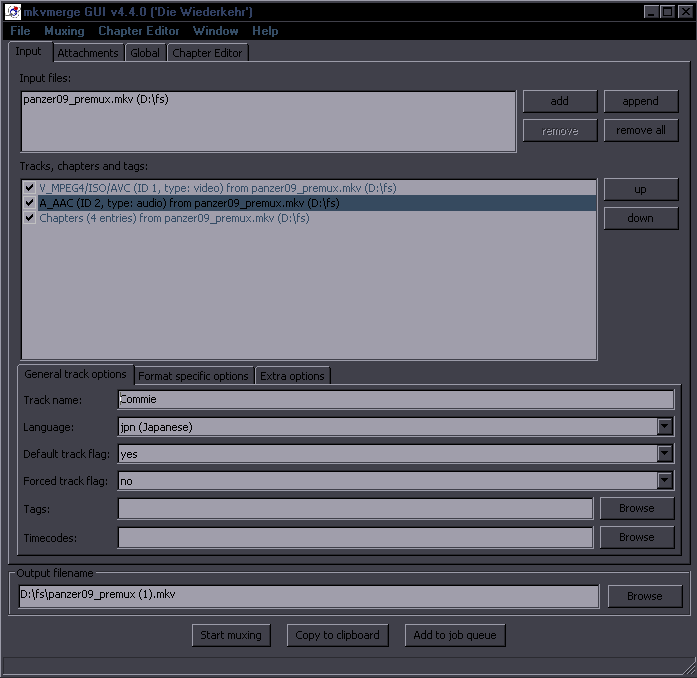 Here I loaded a raw video. It has a video stream, audio stream, and chapters. Audio stream is selected, so in the lower half it shows you some properties of the audio, like language. Down under 'Output filename' you can choose where to save it. 'Start muxing' will... you can guess. 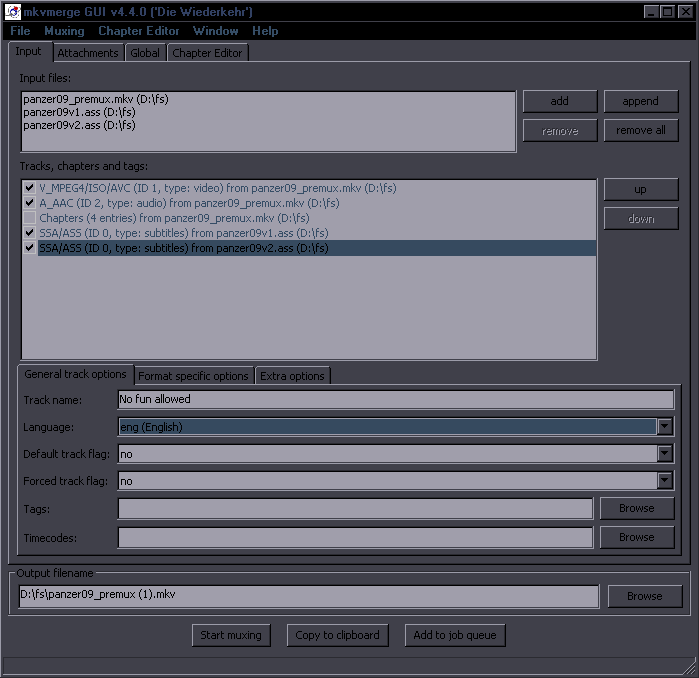 Now I used the 'add' button to add two subtitle streams, as in .ass files. I unchecked the chapters because RHExcelion's chapters are useless because he's too lazy to do them right. Second subtitle stream is selected, language set to eng. You don't have to fill this shit out, but menus in players display this, so it can be useful. If you wonder why there's a second subtitle track called 'No fun allowed,' it is incidentally also RHExcelion's fault. The first of several streams of the same kind will be set as default. If you want the second one default, change it. 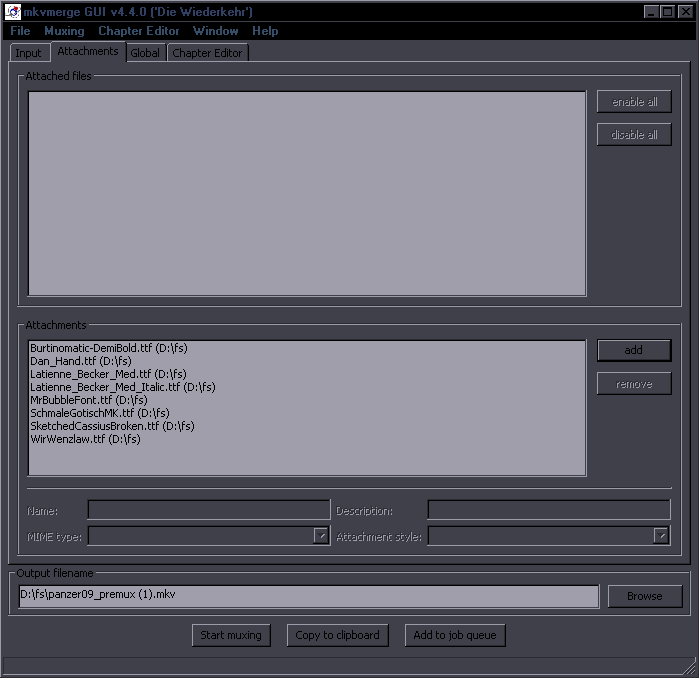 Now you need to add fonts. OK, maybe you don't, but I'm gonna tell you how to do it anyway because this is a guide. Go to the second tab - Attachments - like you see in the picture. The upper half shows files that are already in the mkv. In this cases none, because the raw doesn't have any. The bottom half is where you add your fonts.  Go to the third tab - Global. That's where you add the real chapters, specifically where shown here.  That's about all most of you will ever need, but if by any chance you ever become useful, you may wanna learn more. Under the Global tab there's also 'Splitting.' This allows you to... surprise... split mkvs. If you're wondering how they're split, it means splitting by time, like say, if some idiot leaves commercials in the encode, you'll probably wanna cut that part out, if possible. Unfortunatelly it's not always possible. The limitation is keyframes. The video can only be split at those. Anyway, you're gonna find where the part that needs to be cut out starts and ends, like the 1:30 and 2:00 in the picture. This will seek to 1:30, look for the first keyframe after that, split there, and same with 2:00. The end result will be three mkvs, the middle one being the part between 1:30 and 2:00. Make sure to get the timecodes right, ie in the format shown in the picture, as it's not gonna work otherwise. If it gets split further than you wanted, there was no keyframe between your timecode and that place. You'll have to set the timecode lower to get to the previous keyframe, but the split probably won't be where you need. As you can see, you can also split by filesize, so you can chop the file into 50MB segments or something. Now you may be wondering, since you cut out that commercial, how to put the 1st and 3rd part back together. You'll go back to the first tab, add the first part, and use the 'append' button [ie not the 'add' one] to add the third part. Then you mux, and if you're lucky, you get rid of that commercial and nothing breaks in the process. 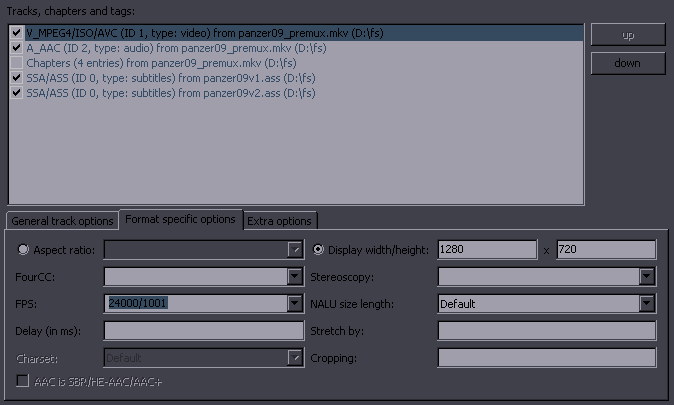 While we're back in the first tab, let's check some of the options we have here. This image shows the video options. You can tell it is so from the video being selected. The useful things here are the framerate and aspect ratio. FPS sets framerate at which the video should play. It will not change the video if you set a different framerate. It will just play at a different speed. Only touch this if you really know what you're doing, otherwise you'll just end up screwing something up. Aspect ratio and width/height are just different ways of defining the same thing. Width/height just defines the aspect ratio, not the actual size of the video. 128x72 will do the same as 1280x720. 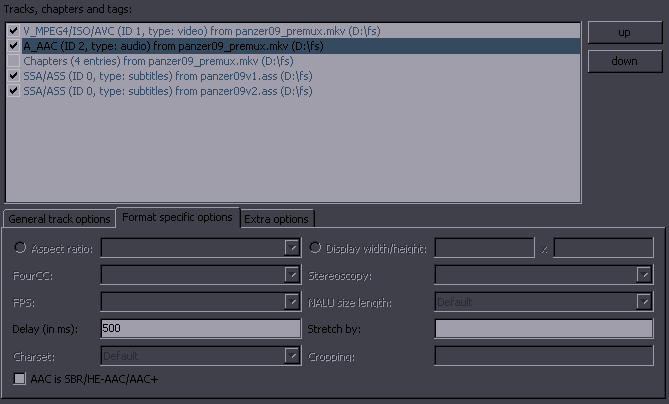 As for the audio options, if audio/video is out of sync, you can set delay on the audio here. I believe you can set negative delay to shift it backwards, but I'm too lazy to try it right now, and since you have nothing better to do, you might as well try it yourself. |