|
| ||||||
|
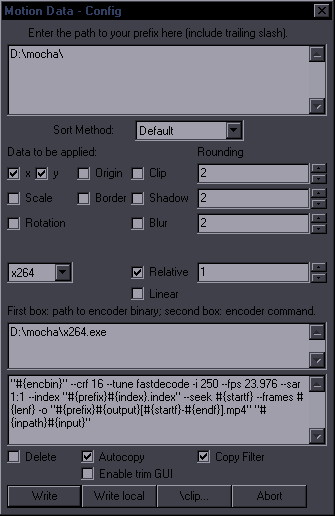
2015 Note: Even though I've updated this a number of times, stuff keeps evolving and changing. Check this site for torque's updated guide to his Motion script. What you need to install: 1. Mocha for After Effects. Any version should be fine. You don't need After Effects. 2. Quicktime or Quicktime Lite (Otherwise Mocha won't load mp4) 3. Aegisub-Motion.lua. Place it in \Aegisub\automation\autoload\. 4. x264 8bit-depth (Mocha can't read 10-bit) Now you need a folder where the clips for mocha will go, and a folder where your x264.exe will be. To make it simple, use the same folder for both. Let's say we'll use D:\mocha\. Open Aegisub and go to the Automation menu. 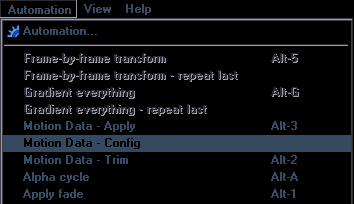 First you need to set up the config.
\clip... - This allows you to use different tracking data for clip than for the sign itself. (Remember this. You'll need it one day.) Let's look at a sign that needs tracking. 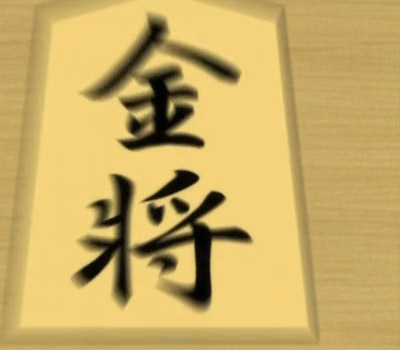  This is what it looks like on the first frame..........................................................and this is the last frame. This is the kind of sign that's easier to track from last frame, and it's better to create it on the last frame too. So we'll start with this:  Time to encode a clip for mocha. Click on "Motion Data - Trim" in the automation menu, and it'll just encode without needing any further action. If it didn't work and it's your first try, restart Aegisub and see if it works after that. If it worked, then you can skip this next section. In case it doesn't, I'll explain an alternative method for encoding the clips. What sometimes also happens is that the script encodes a clip that looks like this: 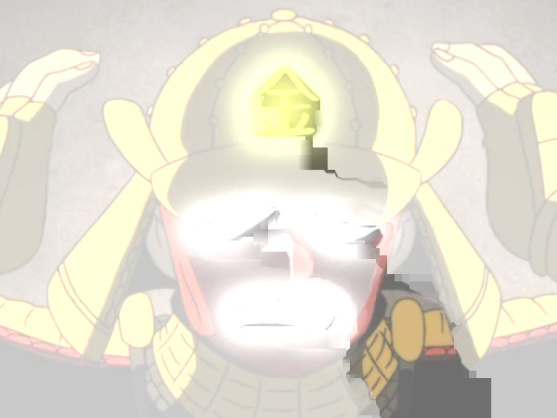 You can try encoding from a previous keyframe, but sometimes even that doesn't help, so I use this other method. (Though in some cases the sign is still trackable even on that shitty encode.) Create mocha.bat with this text in it: x264 --profile baseline --level 1.0 --crf 18 --fps 24000/1001 --seek %2 --frames %3 -o %1_%2.mp4 %1This is with 23.976 fps, so obviously change if needed. Put the mocha.bat where your premux is, along with x264.exe. Open cmd.exe and navigate to the folder with these files (or open it from there in the first place). Then type this command: mocha seki02_premux.mkv 4193 40"mocha" is mocha.bat, seki02_premux.mkv is the video you're encoding from, 4193 is the frame where it starts, and it will encode 40 frames. It's actually 33 frames, so you can be precise if you want, but I think you need to encode one more than it shows in Aegisub. I usually just encode more and then move the red marker for the end frame in mocha. 2015 Note: Another encoding alternative is my Encode - Hardsub script. (But hopefully torque's script is reliable now.) When you have your clip encoded, start up mocha. Open a New Project: 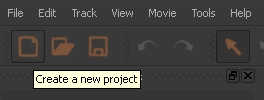 Import a clip:  After you select your clip, hit Enter 4 or 5 times, until all the menus go away. (No need to change anything there.) NOW YOU TRACK THE SIGN. (I'll get back to the tracking itself in a bit. Let's just finish the whole process now.) To export the data, you click on "Export Tracking Data", 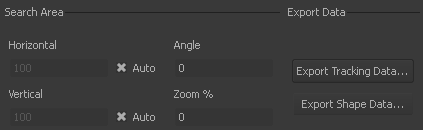 change the format to "After Effects Transform Data", 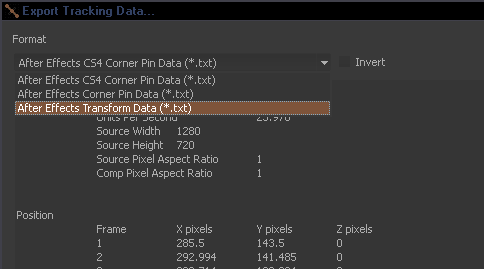 and click on "Copy to Clipboard". Move over to Aegisub, Automation menu, Motion Data - Apply. If the data isn't autopasted, paste it into the top box. I explained the options earlier, so check what you need, and click "Go". Tracking data gets applied to the selected lines, and you're done (as long as you didn't fuck anything up). That's all regarding the Aegisub-Motion.lua. Now for Mocha itself... Tracking a Sign in Mocha So you have your video loaded. Now you need to create a spline to track.  I'm using an old version, but the new ones shouldn't look all that different. You will mostly be using the icon with an X (9th from left). Next to it is X+, then B, and B+. Click on the one with X, and draw a spline like this: 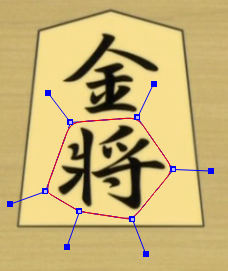 Now you can start tracking. There are 4 buttons you can use... 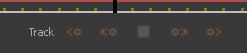 Track backwards | Track to previous frame | Track to next frame | Track forwards It doesn't matter in which direction you track or where you start from. We're tracking this one from the last frame, and on the first frame we should end up with something like this: 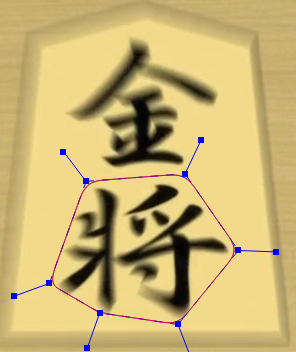 And when you apply the data, the first and last frame will look like this: 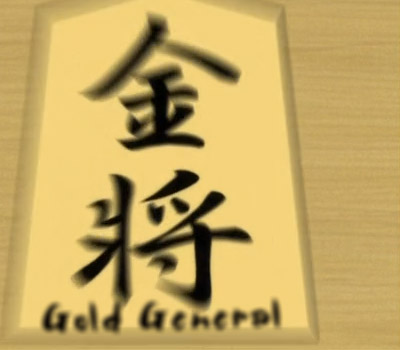 You can try scaling the blur with the script, but it may not match the size scaling, so I usually change the blur by hand. Normally it's only a few frames that need more blur. This sign had some rotations in the middle part, so we track and apply position, scaling, and rotation. For simple signs, you often don't need anything else than to draw a spline and track. If there's no scaling, things usually work out fine. If the tracking isn't going well, you have to tweak the options here:  Luminance / Autochannel: Luminance follows overall brightness/contrast. Autochannel picks red/green/blue channel, depending on which has more contrast (or so I imagine it works). Usually Luminance works, but then there are signs like this:
Min % Pixels Used: To be honest, I don't remember a single time when changing this value would help me track anything. If your spline is going off, you can try increasing or decreasing this value and see if it helps, but I wouldn't bet on it. Smoothing Level: I have no idea what this does, and I've never heard anyone mentioning it either, so probably not important. Translation: This equals position and is always checked. Scale: Check this if the sign gets bigger/smaller, ie. zooms, etc. Rotation: Check this if the sign rotates like what \frz does. Do NOT check the options you don't need, because they'll only make tracking harder in such a case. The other two options are not applicable for Aegisub, so don't check those. Large / Small / Manual... I almost never change this. Just know that you can track manually, adjusting the spline on each frame by hand. Horizontal / Vertical: If a sign makes long-distance jumps, like a fast pan, you may need to increase this value. On the other hand, if the spline jumps off somewhere far when it shouldn't, you can set smaller numbers to limit the area it searches. With simple, continuous, short-distance movement, Auto usually works. Angle / Zoom: Similarly to previous, use larger values if there's more zooming/rotations, and smaller values if the spline is going too crazy. That would be the basics of tracking. Now more about what if it's not working and what tricks you can use. 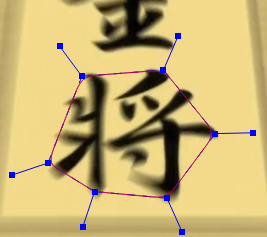 If you compare to the previous pictures, you'll see this spline is too small. That means it didn't scale enough, so you need to increase the Zoom value. It should supposedly be in %, but from experience I can tell you that that's bullshit. I have no idea what exactly the number is, but larger value allows for more scaling, so you just have to try. If the difference seems small, try 10. I usually get the results I need with values between 10 and 20. If it's zooming a lot, then maybe 30. You probably won't need to go over that. If you set some value and the spline actually gets bigger than it should, decrease the value bit by bit until it seems right. It's a bit of a trial-and-error game, but after tracking 100 signs you'll have some idea from experience what values you should use. Tweaking the Angle for rotations follows the same principles as Zoom. Here's an example of what usually happens with zooming signs, and how to fix it. 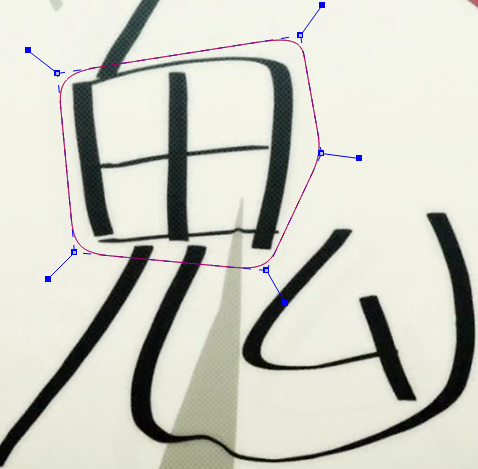 This is the starting spline. 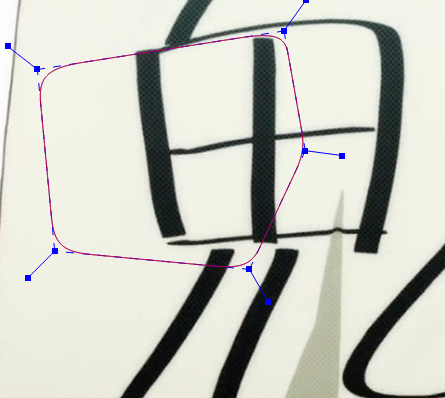 This is what happens with default settings. (1 frame tracked.) You can't see the whole frame, but the sign hasn't really moved much. It just got bigger. Since the spline is jumping far off, we can limit the movement, so I set Horizontal/Vertical to 20. Ctrl+Z; retrack. 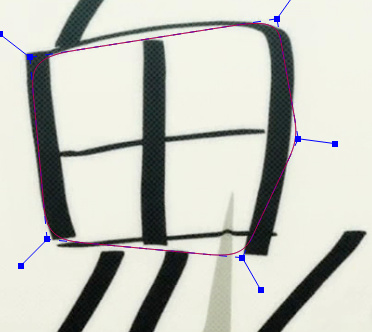 And this is what I get. You see it didn't scale enough, but limiting the movement helped to keep the spline in the right area. So I change the zoom to 20. Ctrl+Z; retrack. 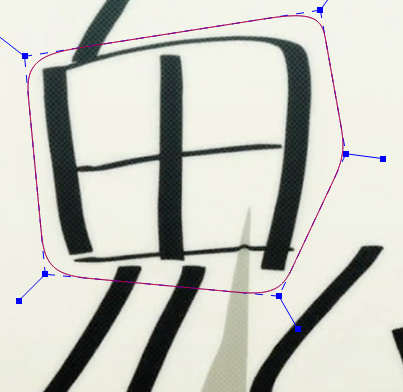 And here we go. I got exactly what I need. If a sign changes on one end more than on the other (zoom, blur, etc.), it's probably easier to track it from the end that changes less, and leave the most difficult frames as last. Or, if needed, you can track it from the middle to the ends. This helps for example with fades. Here you need to track the red sign, moving from right to left... 
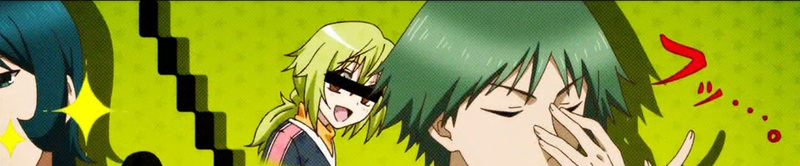


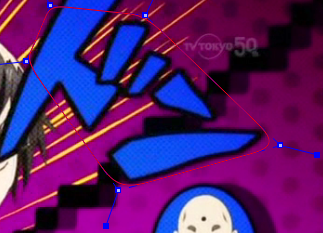
 The sign jumps in fast, then moves slowly across the middle, and then jumps out fast again. It moves horizontally a lot, and vertically a little. The first two and last two pictures are the actual first and last two frames. The middle picture is where it slows down for about 10 frames. Tracking from frame 1 to frame 2 would be hard because there isn't much to select on frame 1, so it's better the other way. The main thing about this sign is that you need to set Horizontal to the max - 500, and Vertical to something like 50. Less Horizontal won't track far enough, and more Vertical will only give mocha more useless area to search and possibly confuse it. Remember those X, X+, B, and B+ icons? The B ones are for Bezier curves. It's usually faster to just make many points with the regular X one, so you can pretty much ignore the Bs. But what about the X+? That one is very useful. It allows you to add another spline to the one you're already tracking, or even replace the old one, like when it starts going off the frame. Let's say you have a pan like this: 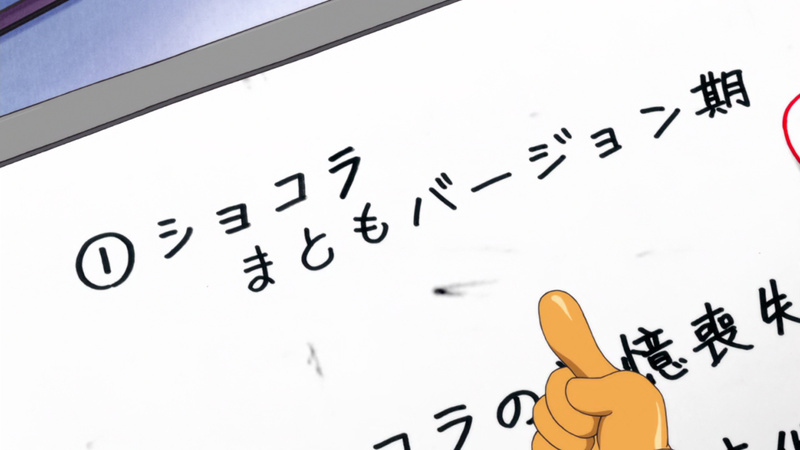
 You can start with tracking the text on the left. When it starts going off the screen, you use the X+ tool, and draw another spline on the right. You can either continue tracking like that, or you can now select and delete the left spline. (You have to draw the new one first before you can delete the old one.) 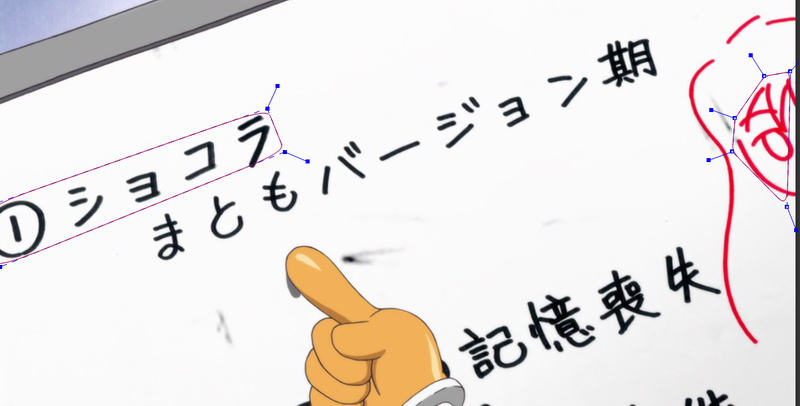
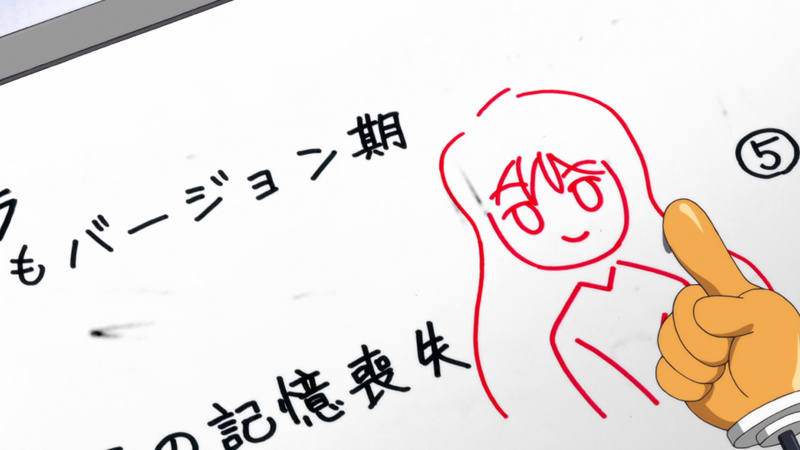
Alternatively, you can press the Q key (or use the icon on the far right) and move the spline to a new place: 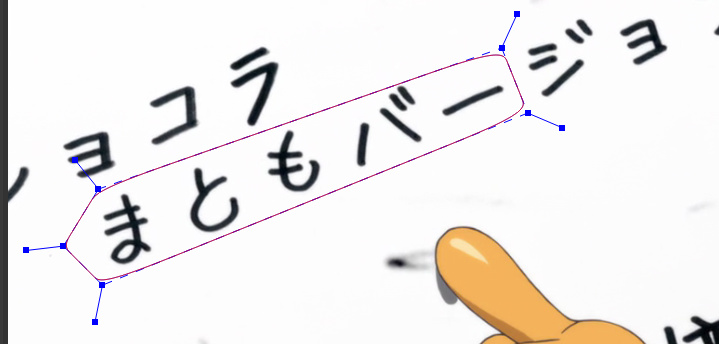 And you can continue tracking. Another trick for whole-screen pans is this: 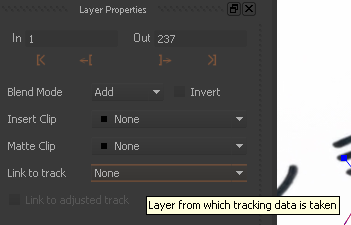 Set "Link to track" to "None" instead of the layer you're tracking. If it's a whole-screen pan, you can draw the spline anywhere, even over the whole screen. The spline won't move when tracking, but it tracks the pixels moving within it, so when you have very long pans, it tracks them well while the spline stays in place. Sometimes things are in the way of the tracked sign. 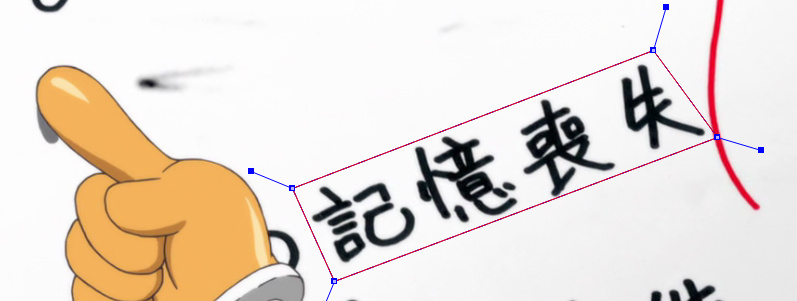 You want to track this sign... 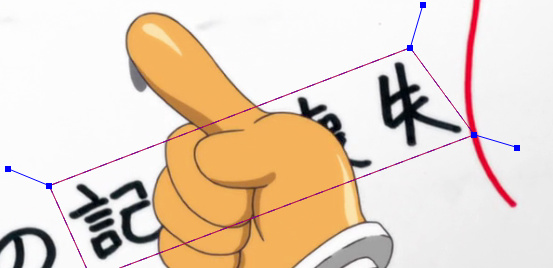 ...but it goes under this hand. In this case it actually tracked perfectly well, but that's not always the case. 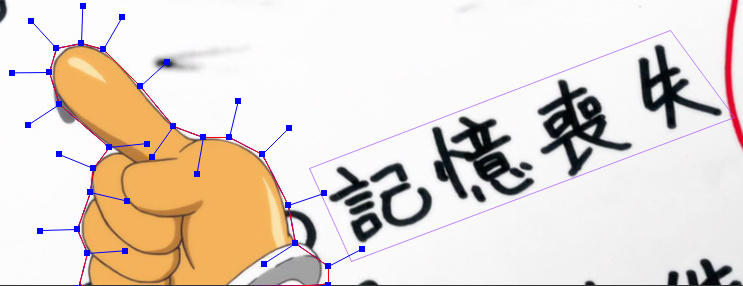 Use the regular X tool to draw a new spline around the hand.  New layers will be placed above the old ones. When they overlap, the bottom layer will not track areas that the top layer is "blocking". If the hand doesn't move, you can click on the middle icon next to "Layer 4" so that it doesn't track the layer. If the hand moves, you can just track with focus on layer 3. Layer 4 will track the hand, and layer 3 will track its spline except the areas covered by layer 4. 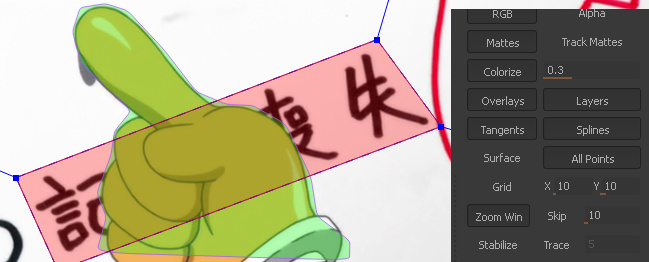 If you enable the "Mattes" in this menu, you'll see the splines filled with colours. Layer 3 will track only the red area here. So for example if you have a slow pan of a building with a sign on it that you're tracking, and a car goes by in front of the building, you can make a new spline for the car to make sure the car won't throw off the sign you're tracking. While we have this menu here, you can also notice the Stabilize button. If you click on that, the focus won't be on the whole frame, but on your sign, so the sign will stay in place while the rest of the stuff moves around it. When you "play" the tracked sign with Stabilize on, you can see more easily how well the spline sticks to the sign. If a sign lasts 30 frames and moves only on the first 5, you don't need to track the remaining 25 frames. Just track the 5 and apply the data. For the typical Japanese animation where stuff moves only every 3rd frame, you can just track every 3rd frame.  This is tracking data that I actually used, since the sign only moved on those 5 frames. No need to flood the script with hundreds of static lines, plus the tracking can actually make the sign wobble a little, while this way you ensure that it doesn't move on the static frames. While we have this image here... If the sign's duration is shorter than the whole clip, you can move the red markers at the ends to set the start and end for the tracked data. The exported data is only what's between the red markers. A problem you may run into is that the video loads stretched vertically in mocha, as in, it shows wrong aspect ratio. If that happens, look to the bottom-left part of the screen, and switch from Track to Clip. Then instead of those things like Search Area, you will see other stuff, including this dropdown menu: 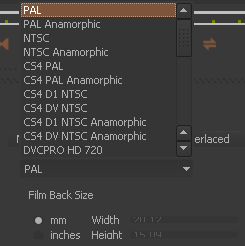 Changing to one of those Anamorphic will probably do the trick. If not, just switch to whatever will look right. (Press * to centre the screen after.) That's about all I can think of now. This should explain how it all works. Learning to track difficult signs is largely a matter of experience, so you have to practice. This guide is mainly to explain how to make a video clip, get it into mocha, track a sign, and get the data back to Aegisub, so you should now be able to do that. For more help, you can check some mocha videos on youtube and other places. |